

Crayon Candle Craft
Inspired by Torie & Howard Organic Candies
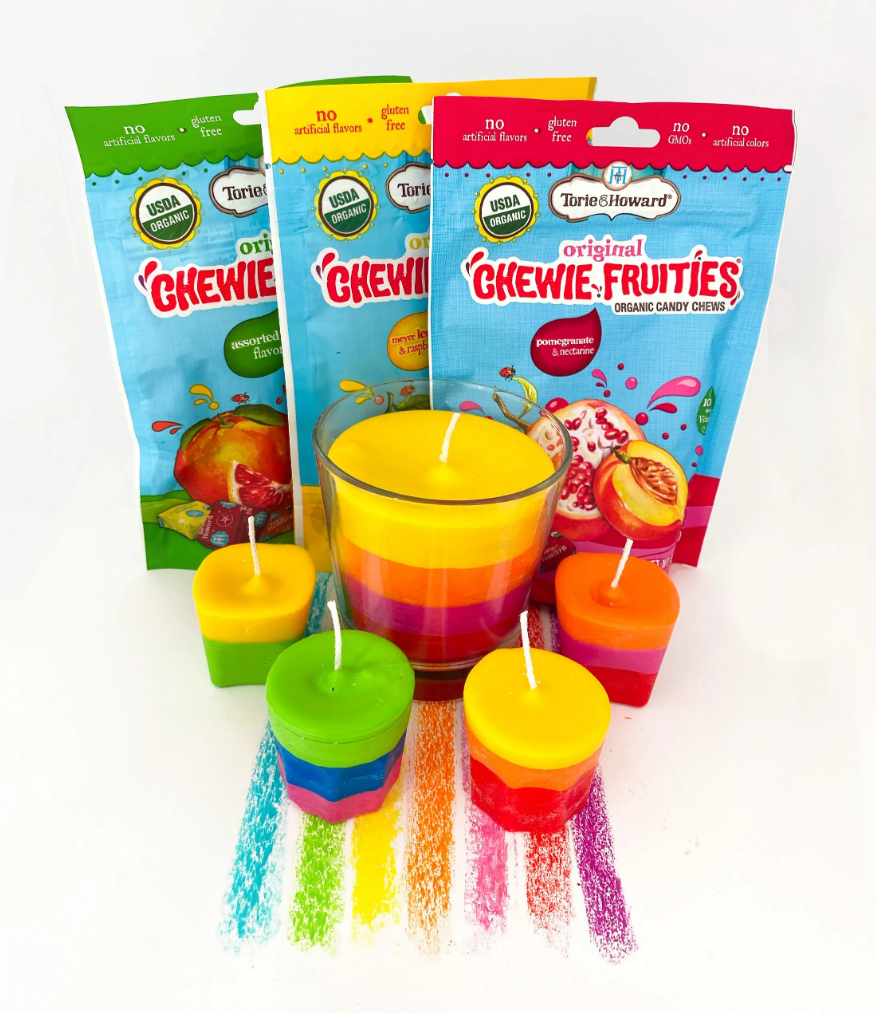
What You'll Need:
- Old or new wax crayons
- Paper cups
- Ice cube mold and/or small glass
- White candle wax or plain white candles
- Candle wick
- Coconut oil (optional)
- Spoon or popsicle sticks for stirring
- Skewer (or anything to hold your wick in place)
- Bowl to melt the wax
- Microwave, stove or oven (all three will work to melt your crayon and wax)
Gather Supplies, Watch Tutorial, and Begin Melting White Wax
Gather the craft supplies and watch the craft tutorial (video found below). Fill a big cooking pot with water and heat it on the stove. Inside, lay a bowl with the white wax – the wax will melt slowly. When fully melted, put your stove on low heat just enough to keep the water warm and the wax liquified. Be careful with the heated wax and help your children at all times.


Soak and Peel Crayons, Melt the Different Colors
Peel the tags off the crayons. Soak your crayons in water for 10 minutes to peel them off more easily.
Fill the paper cups with the crayon colors you would like to use. You can use one paper cup for each color or mix multiple colors in a cup and blend your own. Helpful hint: Break/cut the crayon before placing in the cup.
Add one small spoon of coconut oil to each cup (if you don’t have coconut oil, don’t worry, it works without).
Prepare Your Candle Mold, Pour Melted Wax Mix Into Your Mold
Prepare your candle mold, you can use a glass or an ice cube mold. Place your wick in the middle and secure your wick with a piece of cardboard or a skewer and tape (see craft tutorial).
Put one of the paper cups with crayon in the microwave for 1 minute. Give it a stir and
microwave again in 30 second intervals until wax is completely melted. Heat one cup at a time and stay close to the microwave when heating the cup.
Carefully pour the melted crayon/wax mix in your candle mold. Only fill op a small layer so you can layer your colors evenly. Help your child with this step.


Let Wax Cool, Repeat with More Color Layers
Let the wax cool down for 20/30 minutes before you pour the next layer on top. After 10
minutes you can carefully place the mold in the fridge to fasten the process.
Repeat this process and continue to pour layers in your mold, make sure you give each layer time to cool down.
Yay! your crayon candles are done. Make sure you wait one hour before taking the candles out of the mold.
Similar Crafts

Lei Craft
Oh hey, check out this candy lei! This lei craft is simple, beautiful, and even edible. Grab the supplies you need and have a blast creating with your friends or kiddos!
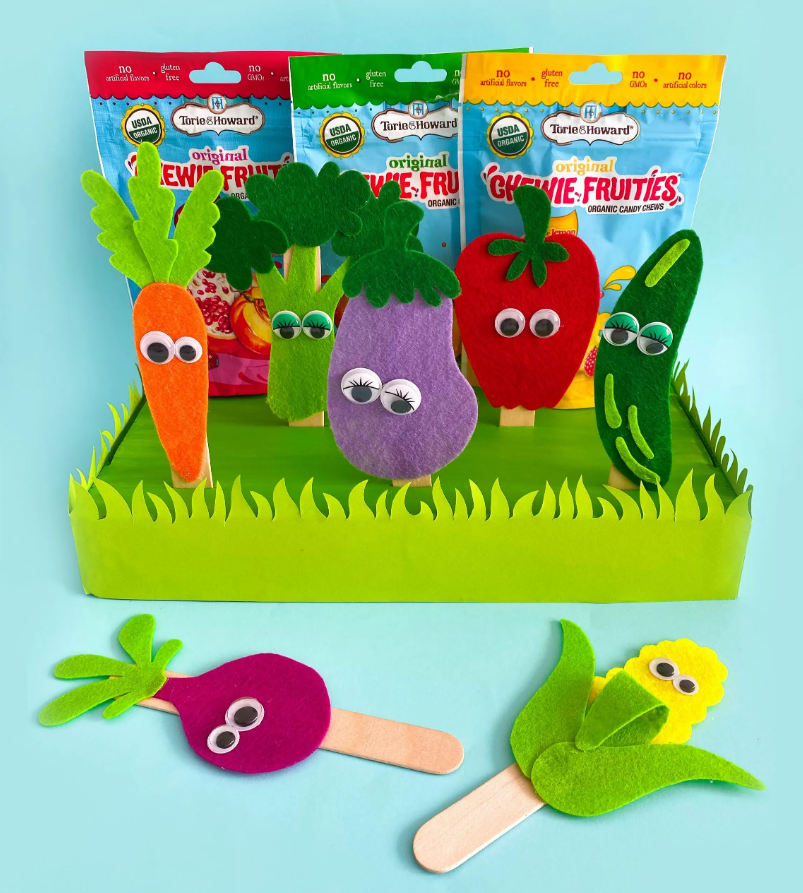
Vegetable Garden Craft
Celebrate “Plant a Vegetable Garden Day” with this craft from Torie & Howard! Gather your kiddos, friends, and supplies, and prepare for a veggie-tastic time.
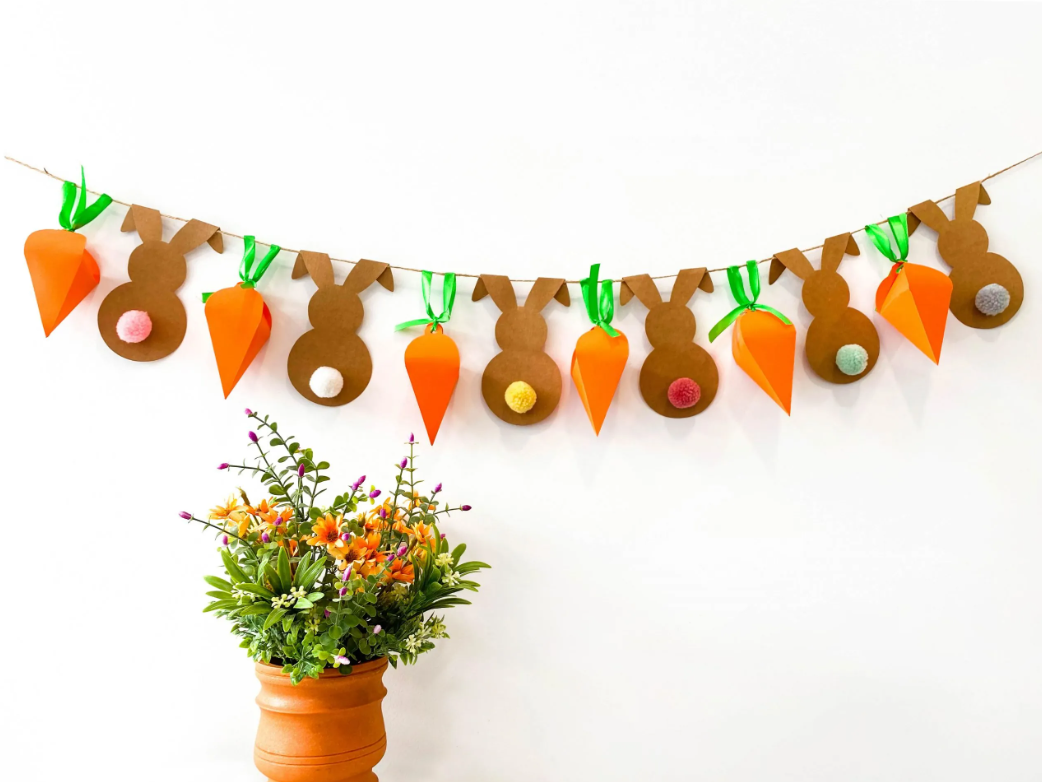
Easter Garland Craft
Looking for a fun way to enhance your Easter season? Gather your besties or kiddos and dive into this Easter Garland Craft featuring super cute carrots and bunnies (and Torie & Howard organic candy)!